Python is at the top of the most widely used programming languages, and that is certainly no accident. Its applications are incredibly diverse, which contributes to its popularity. For example, Python is widely used in API development, in data science, and even in more complex artificial intelligence projects. That is why we decided to create this Python course for a wide audience. Both beginner developers taking their first steps and experienced professionals who want to expand or reinforce their knowledge will find a practical, effective guide here to get started or go deeper into the world of Python.
In this Python course, we will start from scratch. First, we will learn the fundamentals, such as working with text, numbers, and lists. Next, we will explore more advanced concepts, including functions, and finally the principles of object-oriented programming. This way, you will build a solid foundation and be ready to take on real programming challenges.
In this first lesson, we will see how to set up the development environment in 6 quick steps. However, if you already have Python installed on your system, you can skip this part and go straight to the second lesson.
Python Course: How to Install Python 3 on Windows in 6 Steps
Installing Python 3 on Windows is a simple process. Follow the steps below:
1. Download the Python installer
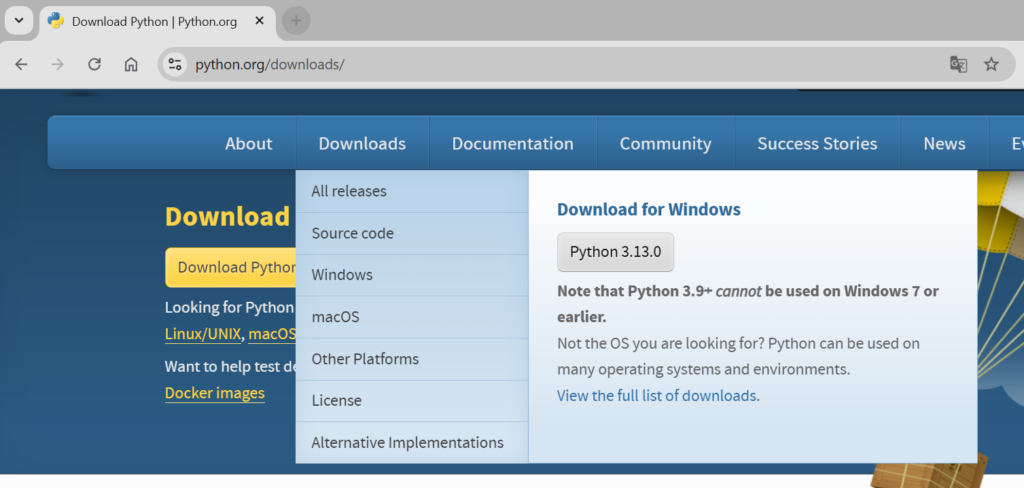
- Go to the official Python website: https://www.python.org.
- In the top menu, click Downloads and select the latest version of Python 3 for Windows.
- The website will automatically detect the right version for your operating system (32-bit or 64-bit).
2. Run the installer
- After the download finishes, double-click the installer executable.
- On the first screen, check the “Add Python 3.x to PATH” option. This is important so you can use Python in the terminal without any additional configuration.
- Click Install Now to start the installation with the default settings.
3. Verify the installation
- When the installation is complete, open the Command Prompt:
- Press Win + R, type cmd and press Enter.
- Type the following command to verify the installation:
python --version- If everything is correct, the terminal will display the installed Python version.
4. Install and verify Python’s package manager – pip
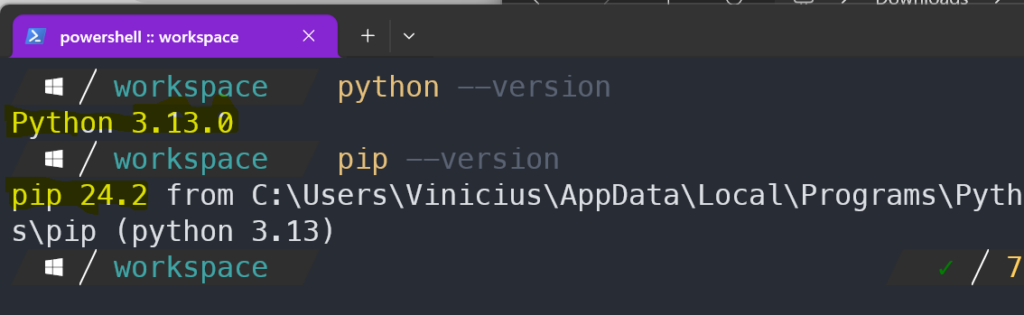
- pip, Python’s package manager, is installed automatically.
- To check it, run:
pip --version- This will show the pip version and confirm that it is installed.
5. Test the installation
To make sure Python is working, open the terminal again and type:
python- This will open the interactive Python interpreter. You can type simple commands such as:
print("Hello, Python!")- Press Enter and see the output.
6. Installing a code editor (Visual Studio Code)
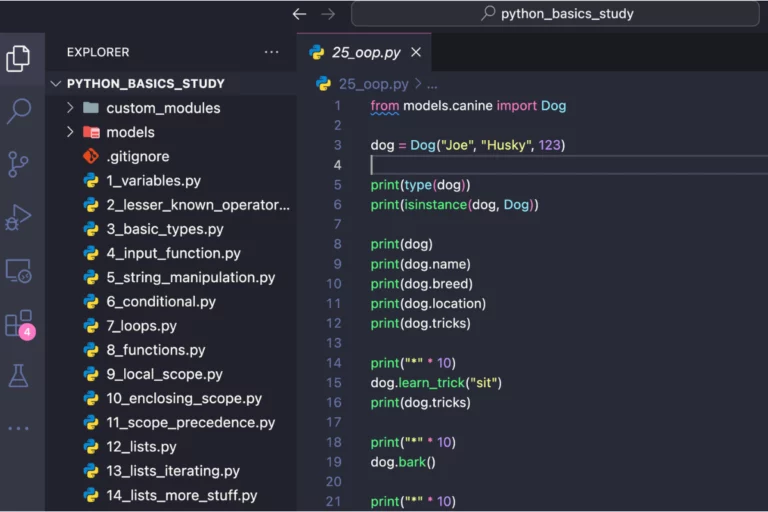
Although you can write Python code directly in the terminal, it is hard to build larger applications that way. So let’s install and configure Visual Studio Code, a great code editor created by Microsoft. This is the IDE we will use for the rest of the course.
Download Visual Studio Code
- Go to the official Visual Studio Code website: https://code.visualstudio.com.
- Click the Download for Windows button to download the installer.
Install Visual Studio Code
- After the download finishes, double-click the installation file.
- Read and accept the license terms, then click Next.
- Choose the installation location or keep the default, and click Next.
- On the additional options screen, check the following options (recommended):
- Add “Open with Code” action to Windows Explorer file context menu
- Add “Open with Code” action to Windows Explorer directory context menu
- Register Code as an editor for supported file types
- Add to PATH
- Click Install to start the installation.
- After the installation, click Finish to open Visual Studio Code.
Install the Python Extension
- Open Visual Studio Code.
- In the left sidebar, click the Extensions icon (or press Ctrl + Shift + X).
- In the search bar, type Python.
- Find the official Microsoft extension called Python (a yellow snake icon) and click Install.
- The extension will be installed automatically. It adds support for:
- Syntax highlighting.
- IntelliSense (autocomplete and hints).
- Debugging.
Configure Python in VS Code
- In VS Code, open a new file (Ctrl + N) and save it with the .py extension (for example: my_script.py).
- When you open a Python file for the first time, the extension may ask you to install additional dependencies, such as pylint. Accept the suggestions.
- To select the correct Python interpreter:
- Press Ctrl + Shift + P to open the command palette.
- Type Python: Select Interpreter and select the Python 3 interpreter installed on your system.
Test the Environment
I reproduced the expected result. Here is what it looks like:
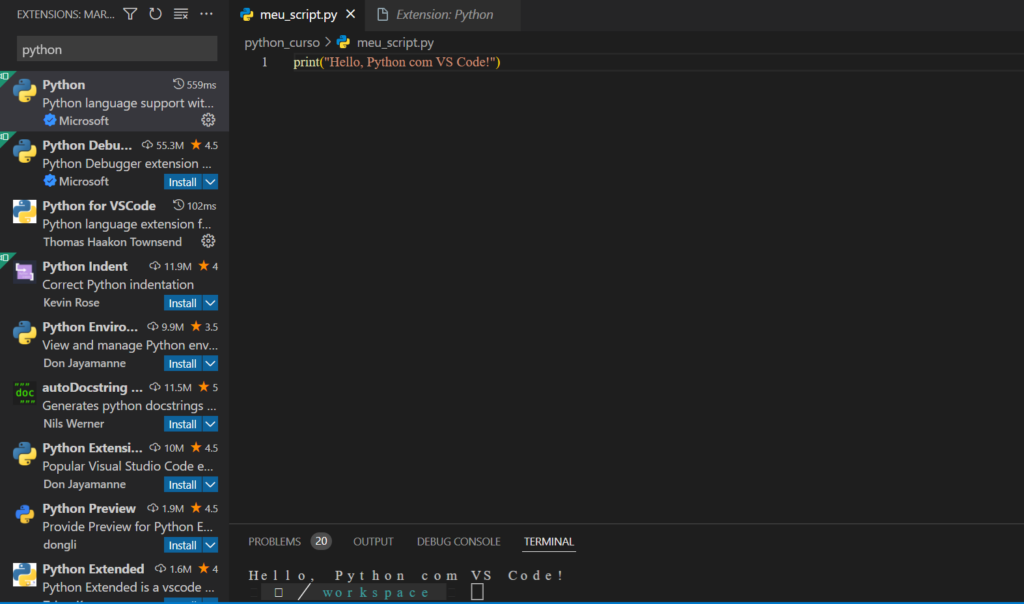
- Create a simple script in the Python file:
print("Hello, Python with VS Code!")- Save the file (Ctrl + S).
- To run it, click the “play” icon in the top-right corner or press Ctrl + F5.
- Check the output in the integrated terminal.
Conclusion
You are now ready to start programming in Python on Windows with Visual Studio Code! 🚀 If you run into any problems, share your question or check Python’s extensive documentation and community.
Check out the second lesson of our Python course, where we talk about variables: Variables in Python.
Take a look at the big picture of what a Python program looks like in this article.